5th post of the Home Server series in which I explain how I built my own server.
In previous posts I have shown how to install an SSD disk to your HP microserver Gen8 server. Even if you do not have this hardware, in this post I will show step by step how to install the VMWare ESXi 6.5
Download ISO image
Obviously you need the software you want to install. There is a factory ISO image ready to install in a HP Microserver Gen8 you can download here, but you can search for a generic image:
https://my.vmware.com/web/vmware/details?downloadGroup=OEM-ESXI65U2-HPE&productId=614
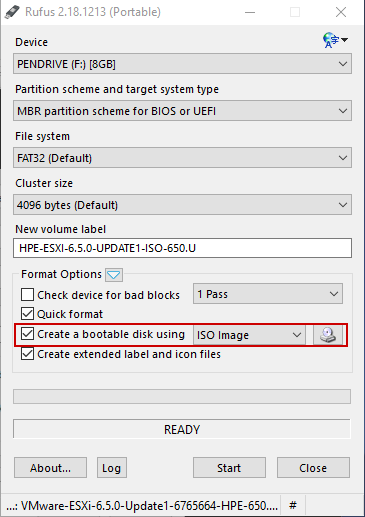
Now its time to boot your machine using the ISO. You have multiple methods, but I suggest creating a bootable USB.
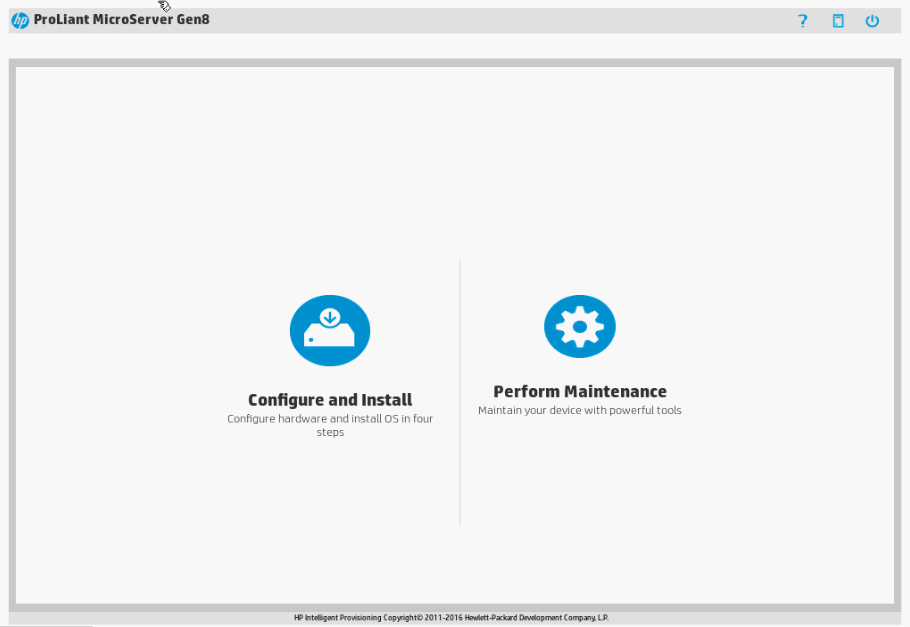
Note: HP Gen 8 “Configure and Install” method didn’t worked for me with the following error: “No media found that matches the selected OS family. Please select a Valid Media/Path”
Create bootable USB
Download and run Rufus software. Select your USB disk and the downloaded ESX image and wait until finishes creating it.
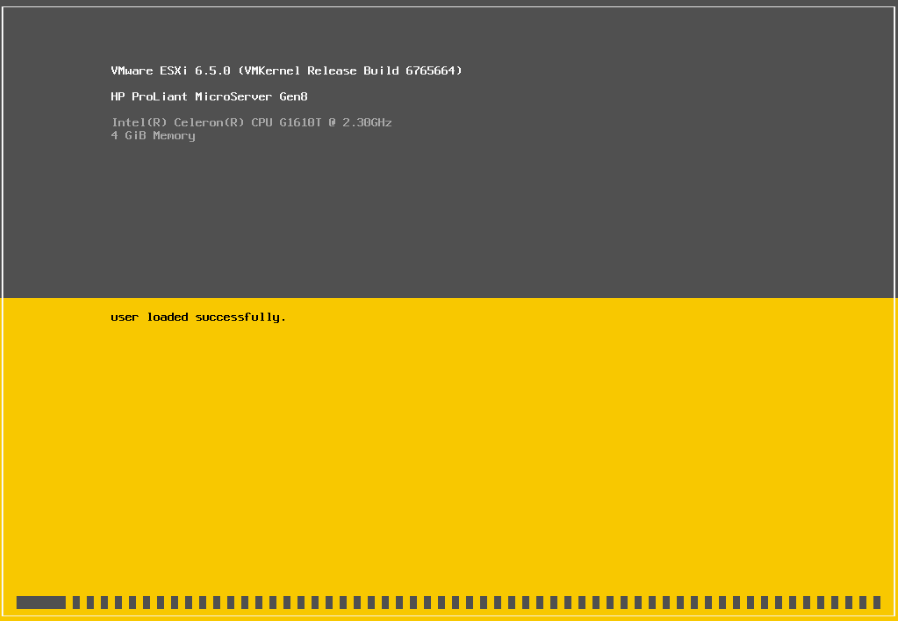
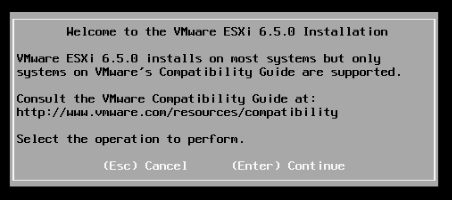
Install ESX
Boot up machine from USB
Force the boot menu or change the order and run the USB to start the ESX 6.5 installation process

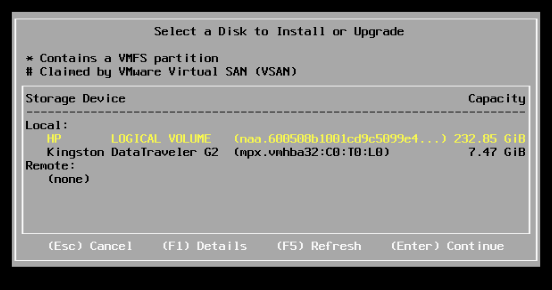
Select disk
Select the disk in which you want the ESX to be installed (I used the disk i installed on the previous post.)
Select keyboard layout
Select the keyboard layout you prefer

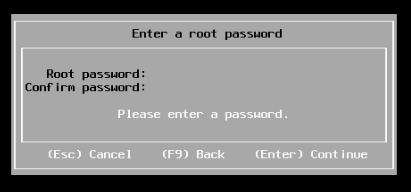
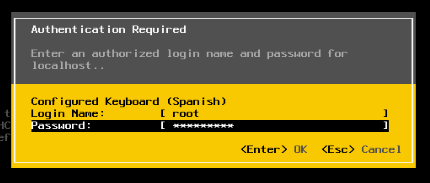
Enter root password
Set the root password (dont forget it hehe)
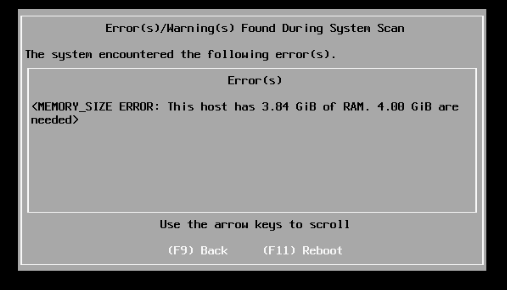
MEMORY_SIZE Error (only if 4GB or less)
If during the installation you get the following error: “<MEMORY_SIZE ERROR: This host has X GiB of RAM. 4.00 Gib are needed, there is a way to cheat the checking requirements script.
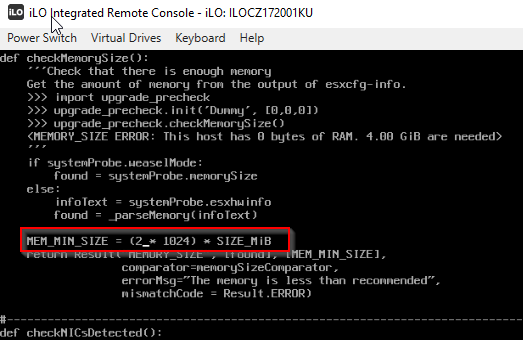
Press Alt+F1 to open a shell and login with “root” (no password is needed).
Run the following commands
# cd /usr/lib/vmware/weasel/util
# rm upgrade_precheck.pyc
# cp upgrade_precheck.py upgrade_precheck.py.old
# chmod 666 upgrade_precheck.py
# vi upgrade_precheck.py
Search for the string “MEM_MIN_SIZE and replace (4 * 1024) by a lower number like (2 * 1024).
Run the following command to get the /bin/python weasel/main.py PID (first column)
# ps -c | grep weasel (in this example the PID is 66929)
And finally kill the process to make the installation restart:
# kill -9 <PID>Confirm install


Finished – Console screen
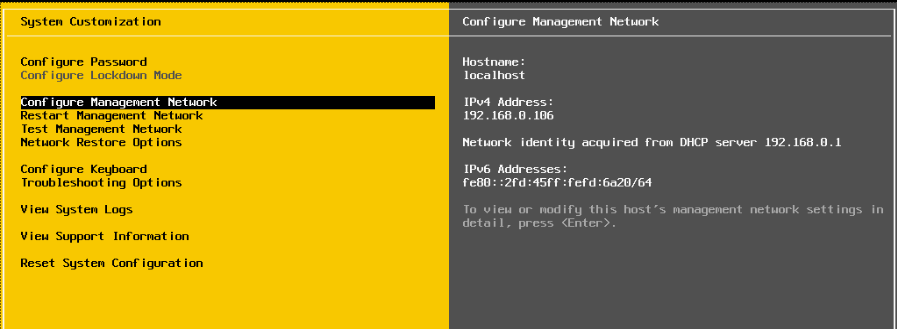
In the main console screen of ESX it shows the URL in which you can connect to the web GUI (in the example http://192.168.0.106).

This IPV4 address (192.168.0.106) has been assigned dinamically via DHCP. Let’s configure it as a fixed static IP.
First steps after installing ESX
Enter the console settings screen
Press F12 so you will be asked for user password (the one you configured in a previous step)
From this menu previously configured settings can be changed like password, keyboard layout, management network… Also system logs can be viewed.
Configure management network
Instead of letting DHCP assign an IP, its better to configure an static IP.
Select the “Configure Management Network”
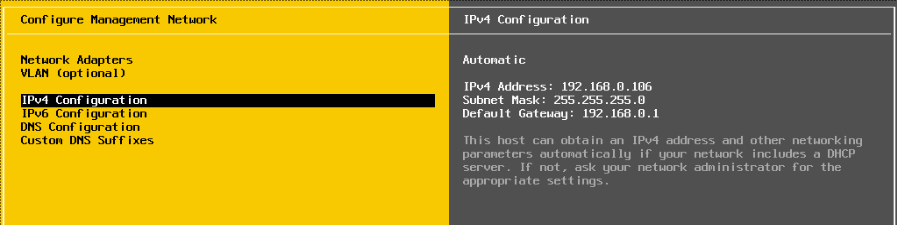
IPv4 Configuration
And enter the desired address, mask and gateway:
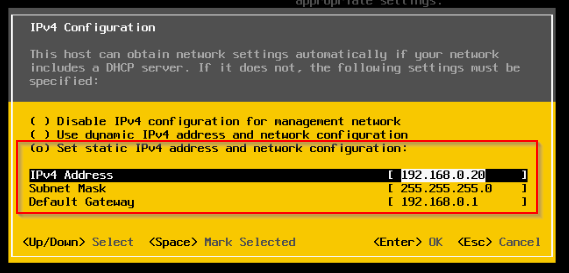
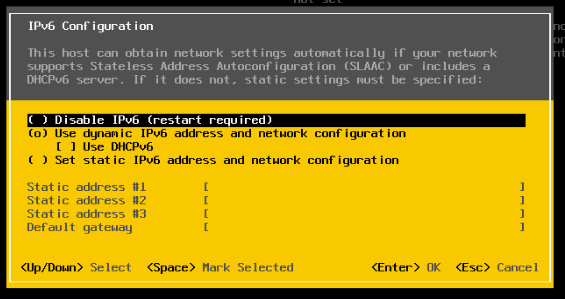
If does not apply in your environment, disable IPv6
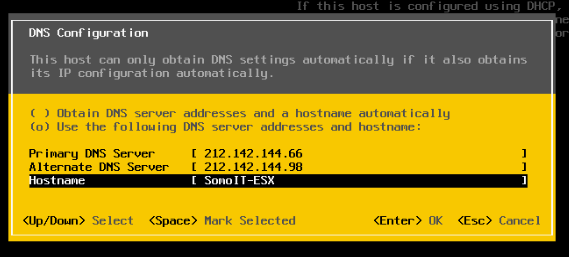
And DNS servers and hostname can also be set
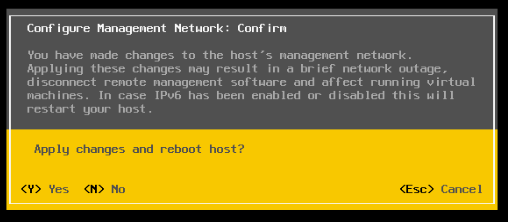
After applying changes, a reboot is needed
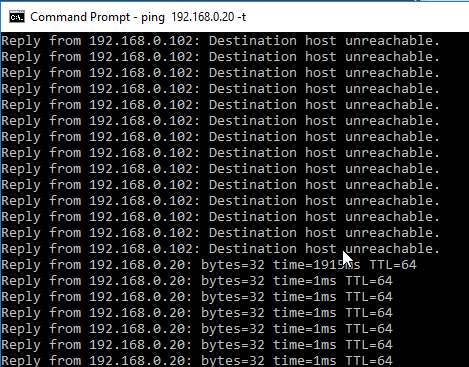
Launch a ping with the newly configured management IP address and wait for it to reply
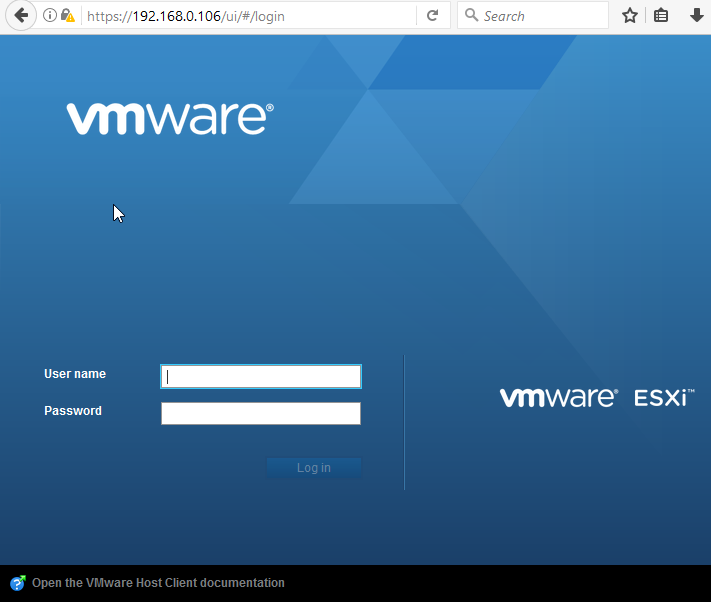
Enter the web GUI
Browse to https://<YOUR_MANAGEMENT_IP> (in this example https://192.168.0.6, because the screenshot was taken before setting the static IP), and enter user and password (again the same credentials).
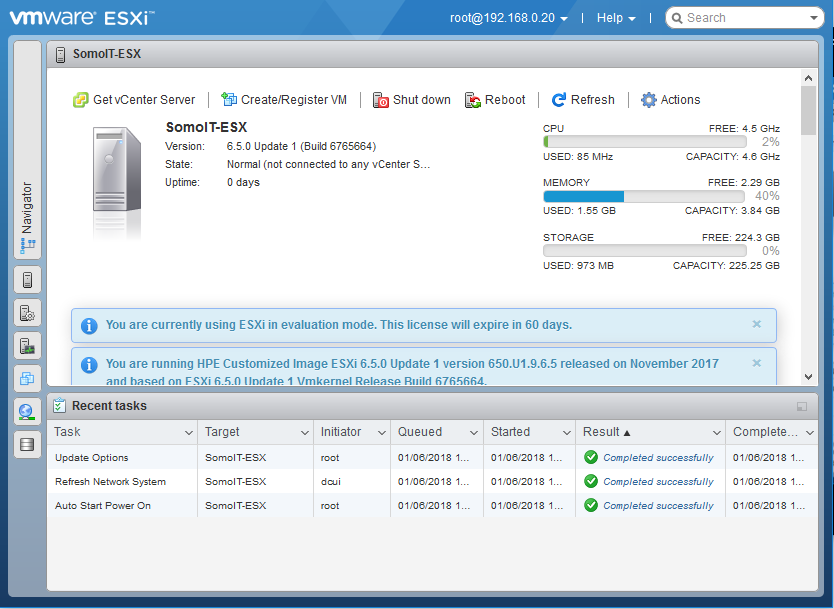
This is the main site in which you will manage your virtualization environment (unless you use a vcenter server).
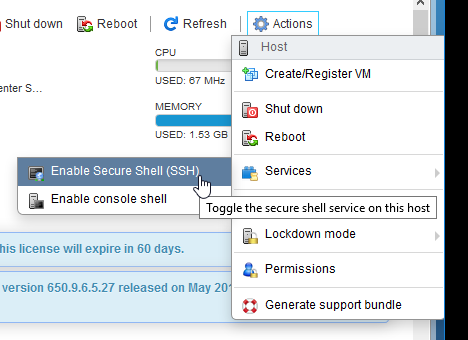
Enable Secure Shell (SSH)
Click “Actions”, select “Services” and click “Enable Secure Shell (SSH)”
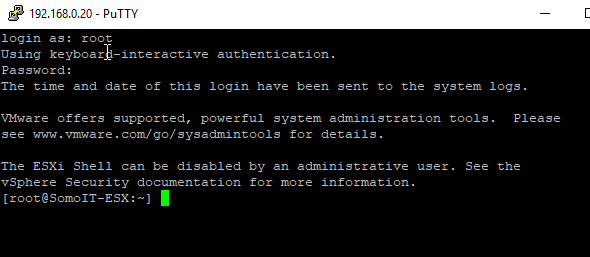
Now Its possible to connect via SSH to the management IP in case its needed at any time
Enable NTP Service
Try to start the NTP service by the following menu options:
In Host / Manage / Time & Date / NTP service / Start
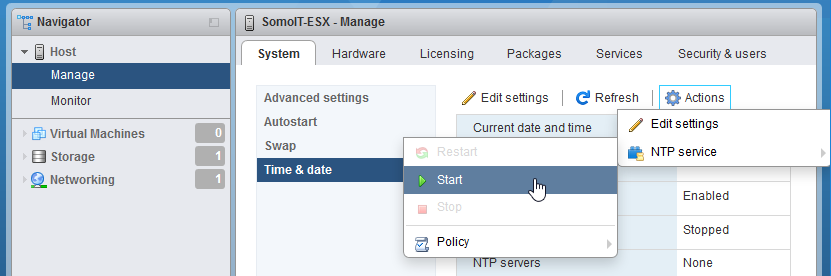
In case it fails with an error..

…edit the NTP settings in Host / Manage / Time & Date / Edit settings, and set the following values or the servers you think will offer the best response times…
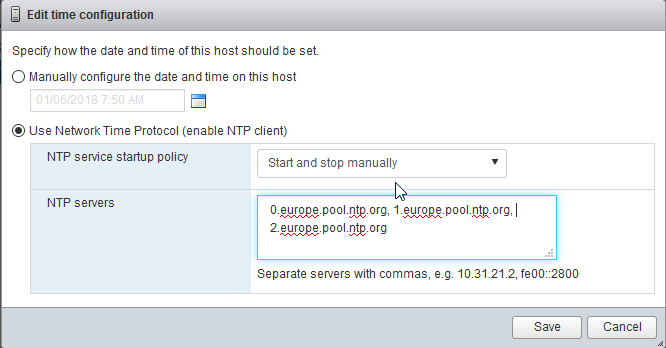
.. and try starting it again


So, now we have a flamant recently installed