Windows   Windows – Cannot cannot shrink a volume beyond the point where any unmovable files are located


I finally received my new Dell Inspiron 15 Serie 5000 with a 1TB hard disk!

Target

I would like (maybe very shortly) to move the system and applications to a new SSD drive (perhaps 120GB or 240GB size). So, given that the C: (system) partition has only 30 GB used (~896 GB of total size), one of the first configurations I wanted to do with my new laptop was shrinking this partition to 120 GB.

To upgrade to a SSD drive, follow this step by step tutorial by following this link:
HW – Upgrade laptop with an SSD drive

Problem / Error

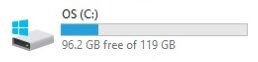
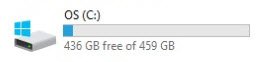
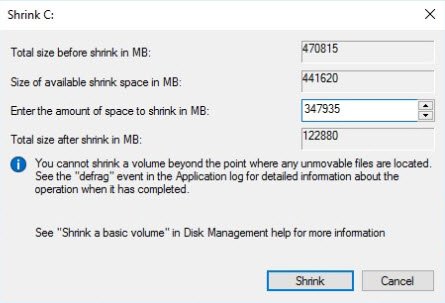
The problem was that, after performing the shrinking, I could reduce the size only to ~460GB (not enough for my purposes).
C: size before shrinking
Maybe after running a defragmentation process I could try to shrink. So i ran the process  and when trying to reduce the size again, it still didnt allow a single MB more…
You cannot shrink a volume beyond the point where any unmovable files are located
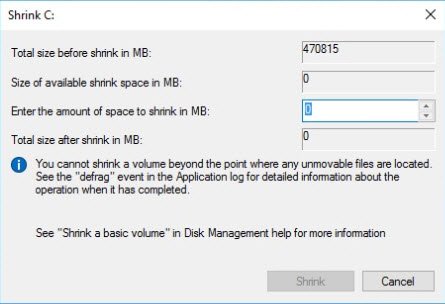
..and still showing the message “You cannot shrink a volume beyond the point where any unmovable files are located. See the ‘defrag’ event in the Application log for detailed information about the operation when it has completed”

Analysis

Now that the partition is defragmented, the “unmovable files” could be any of the following (probably located in C:):

  • Hibernation – “hibernate.sys”
  • Pagefile – “pagefile.sys”
  • System protection – “System Volume Information” folder

The ‘defrag’ events showed the following:
Defrag Event ID 259 unmovable files

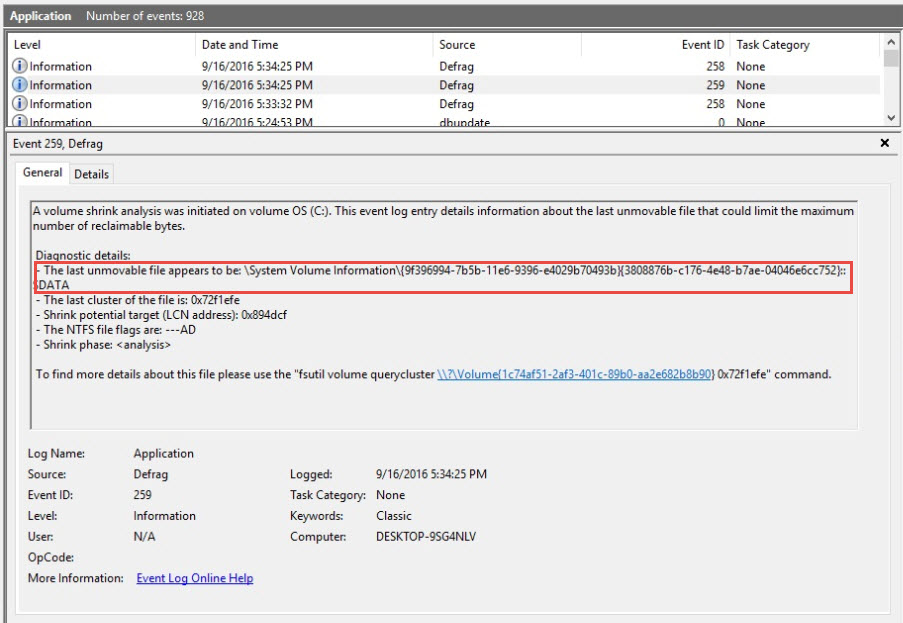
So, the problem (at least one of them) seems to be a file in “System Volume Information”.

Solution

Temporary i had to disable the System protection configured against C:
Anyway, the hibernation and pagefile could afterwards lead to the same error, so I decided to disable all of them:

1. Disable HIBERNATION

C:\> powercfg /h off

2. Disable PAGEFILE

C:\> SystemPropertiesPerformance.exe

Disable pagefile

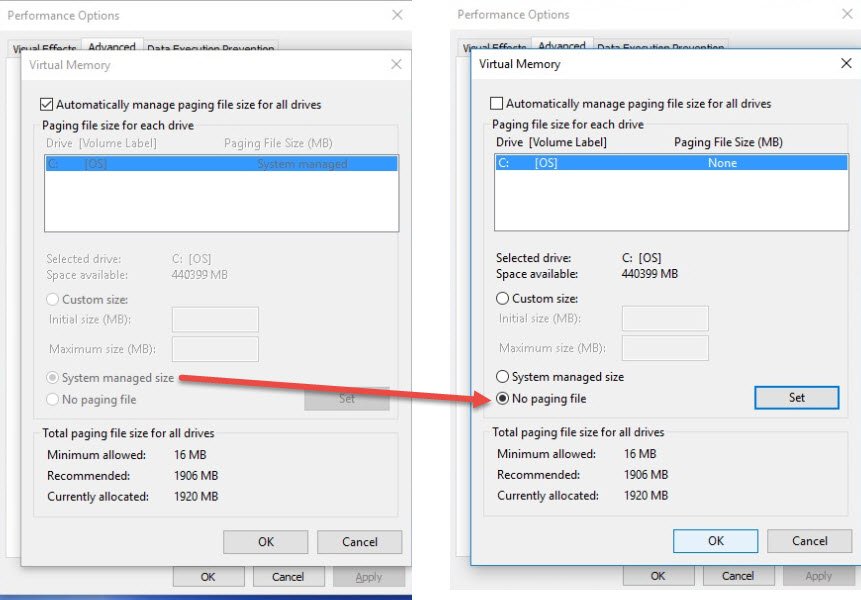
3. Disable SYSTEM PROTECTION

C:\> SystemPropertiesProtection.exe

Disable system protection

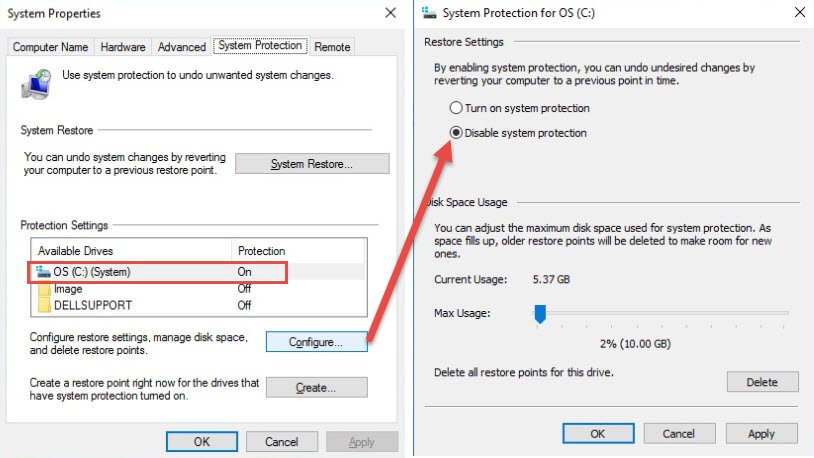
3. RESTART AND SHRINK

After restarting the system, the changes were applied.
I could then shrink to the size I wanted!
Shrinking is now possible
It is critical to reenable the features after the resizing is made (the following steps)…

4. ENABLE HIBERNATION

C:\> powercfg /h on

5. ENABLE PAGEFILE

C:\> SystemPropertiesPerformance.exe

Reenable pagefile

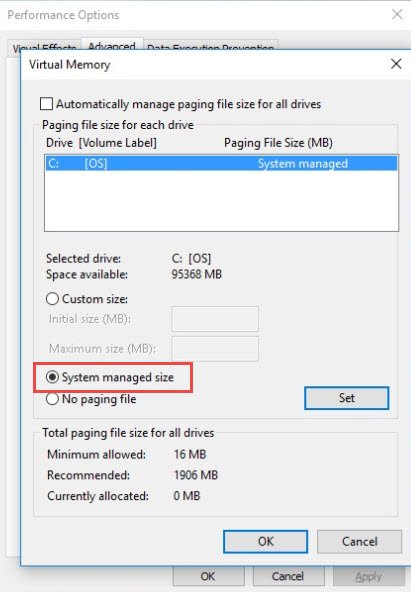
6. ENABLE SYSTEM PROTECTION

C:\> SystemPropertiesAdvanced.exe
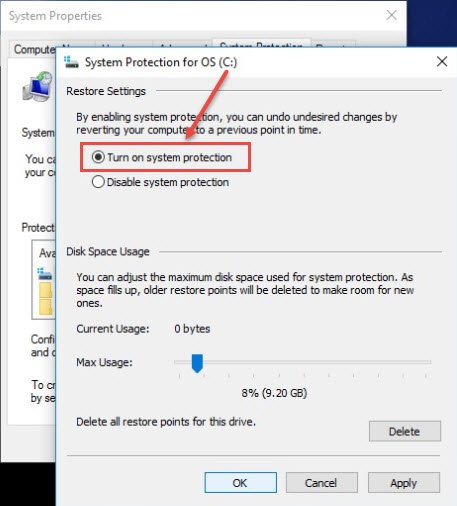
Reenable system protection

Problem solved

3rd party tools are able to manage these “unmovable files” but if you want to avoid using one of those solutions, simply by disabling temporary these features the shrinking you want could be possible.

Now Im ready to migrate my 120GB system partition to a SSD drive when needed 😉

To upgrade to a SSD drive, follow this step by step tutorial by following this link:
HW – Upgrade laptop with an SSD drive

C: size after shrinking
C: partition after shrinking

28 thoughts on “Windows – Cannot cannot shrink a volume beyond the point where any unmovable files are located

  1. it didn’t worked for me. even after doing all the steps it’s still showing not enough space on drive to perform this action.

  2. Thanks a lot!!!

    I was trying to create a 100 GB Linux partition . But my stubborn C:\ refused to give me more than 40GB.
    Thanks to your website, I was able to create that 100GB partition….

    Your explanation was helpful and super easy to follow!!!

  3. Excellent tutorial- I followed it and temporarily disabling System Protection and the pagefile worked perfectly for me. Thank you!

  4. For those who still have an issue. Try to shrink volume, if it shows 0 or low value, go to Event Log > Application, look for an event from Defrag source. There will be something like :
    “A volume shrink analysis was initiated” … and you will see some diag details. Important part is Last unmovable fie. You need to delete this file.
    In my case it was windows.ebd file, created by Windows Search service. Go to Control Panel > Indexing options > Advanced > click Rebuild.
    Run shrink again and check the analysis log again.

    • Thanks man that helped so much ! I was desperate as most sites tell about hibernation pagefile and protection but nothing to help when it doesn’t work 🙂

  5. Hi,
    If you followed the instructions and it still doesn’t shrink you can try to follow Ferdinand’s instructions above. Or read the answer from user ‘mpro’ on superuser carefully:
    https://superuser.com/questions/1017764/how-can-i-shrink-a-windows-10-partition/1325294#1325294

    I want to add one more thing:
    I discovered that to get the information about the last unmovable file in “defrag” messages in event viewer –> windows logs–> applications, you need the warning message with event id = 260. However, when I was trying to shrink my C: drive by 100GB, no such message would appear in event viewer. When I tried to shrink by 2GB however, it showed up and told me exactly which file was crashing the process (last unmovable file). Removing this file and trying to shrink by 2GB suddenly it worked! I had to do this process iteratively with larger partition shrink sizes and after about 5 shrinks I had 100GB unallocated disk space. YAY!

    Oh, and all the unmovable files were old backup files on my university One-Drive directory. I deleted the entire thing for good riddance (after disabling sync!)

    Hope this helps!

  6. Excellent write-up. Like other commenters, I was encountering a message that there was not enough disk space after following your steps, I simply had to break my shrink operation in to 3 smaller chunks.

  7. Excellent. Works like a charm. If anyone encounter message as “Unable to perform operation. An unexpected error has occured. Function failed during execution” , try running command prompt as administrator

  8. Thank you!! OMG this was such an annoying thing to fix because I am just trying to dual boot and I had plenty of space. Screw windows for putting random files all over the place and making it difficult to do these. I was tempted to just overwrite windows with ubuntu but found your guide and it worked for me!

    I disabled the 3 files, did the restart, and also opened the disk management by right clicking on the start (maybe opening as admin helped too). THANKS A BUNCH, NOW I CAN PROGRAM SOME ROBOTS

  9. Thank you,
    if i follow this 3steps, it works but, it didn’t shrink more than 8gb in my c drive
    but i have 395gb free space in my c drive

    • Go into the event viewer and find any defrag events that show the last unmovable file path. Find that file and delete it (if it’s safe to do it, you might have to disable some running services). You also might need to repeat this process several times to get enough space, each time you try to shrink you may find a new event in the event logs. For me – I had to do this process about 4 times, each time it gave me more space to shrink. Eventually I had enough for what I needed.

  10. Thanks, I have been able to successfully partition my ssd.

    I thought it wasn’t working at first but I forgot to click the Set button for removing the swap file.

Leave a Reply

Your email address will not be published. Required fields are marked *