If you need to update automatically a DNS entry with your public IP address (for example, to allow remote access to your home Raspberry or Linux), you can use the no-ip provider and its Linux or Raspberry client.
This posts shows the way to install the client and how to configure it to be started at boot time.
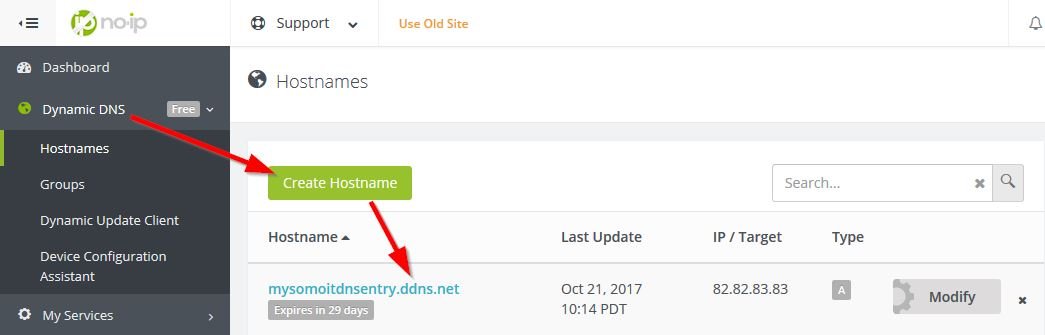
Register at noip.com
Browse https://www.noip.com/sign-up and register for a free account

DNS entry must exist
A DNS entry must previosly exist to allow the client to update it.
Install the client
As root or using sudo, run the following:
cd /usr/local/src
wget http://www.no-ip.com/client/linux/noip-duc-linux.tar.gz
tar xzf noip-duc-linux.tar.gz
cd noip-2.1.9
make
make install
The installation will ask for the previously created account and the update interval:
Auto configuration for Linux client of no-ip.com.

Please enter the login/email string for no-ip.com  mysomoitaccount
Please enter the password for user 'mysomoitaccount'  *********

Only one host [mysomoitdnsentry.ddns.net] is registered to this account.
It will be used.
Please enter an update interval:[30]
Do you wish to run something at successful update?[N] (y/N)
Configure the client as service
Now we have to configure the client to be started as a service at boot time.
The no-ip client downloaded package comes with a bash script almost ready to be configured at boot time.
Copy script to init.d folder
cp /usr/local/src/noip-2.1.9-1/debian.noip2.sh /etc/init.d/noip2.sh
chown root.root /etc/init.d/noip2.sh
chmod +x /etc/init.d/noip2.sh
Add the init info
Edit (with your favourite editor like nano, vi…) the /etc/init.d/noip2.sh file to add the init info headers:
#!/bin/sh
#
### BEGIN INIT INFO
# Provides:          noip2.sh
# Required-Start:    $remote_fs $local_fs
# Required-Stop:     $remote_fs $local_fs
# Should-Start:
# Should-Stop:
# Default-Start:     2 3 4 5
# Default-Stop:      0 1 6
# Short-Description: Dynamic IP client updater
# Description:
### END INIT INFO

DAEMON=/usr/local/bin/noip2
NAME=noip2

test -x $DAEMON || exit 0
...
Now the client can be started, stopped or restarted manually
/etc/init.d/noip2.sh <start|stop|restart>Create the runlevels links
To allow starting the service automatically at startup, run the following command:
update-rc.d noip2.sh defaults