In another post we saw the way to configure a SSH connection to Linux without password via public/private key. To allow SSH connection without interaction (without password) to Cisco Ironport ESA (Email Security Appliance) from a Windows machine is a bit different. These are the different steps:
Generate public/private keys
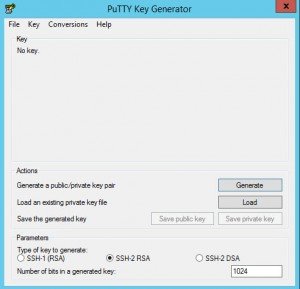
To generate the keys, we will use Puttygen (PuTTY Key Generator) that allows us to generate public and private key pairs that can be used, for example, for SSH connections the same way “ssh-keygen” does. But unlike ssh-keygen, puttygen uses its own .ppk format that can be converted to other formats.
Download either the 32 bit version or the 64 bit version by clicking one of the following links:
– Puttygen 32 bit version
– Puttygen 64 bit version
For more information visit https://www.puttygen.com

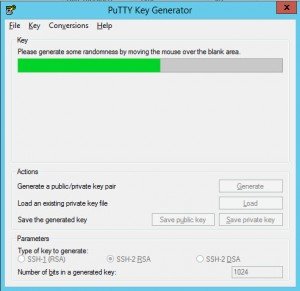
After pressing “Generate” button, it asks us to move the mouse to generate randomness

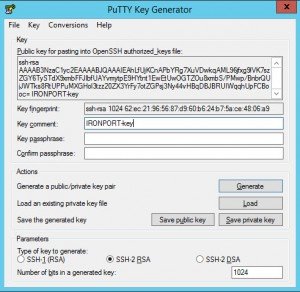
The keys have been generated. Optionally we can change the Key comment to “IRONPORT-key” for example.
Then we push the “Save private key” button and save it giving it any name (IRONPORT.ppk).
Same for public key (IRONPORT.pub).
Finally, copy (Ctrl+C) the public key (the text on the upper rectangle) to be used later.

Configure public Key in Ironport
To import the public key into the Cisco Ironport ESA, a CLI session must be opened to execute the sshconfig command like this example shows. The command allows us to paste the previously copied public key.
login as: admin
admin@MYIRONPORT's password:
Last login: Fri Feb 26 09:45:40 2016 from 192.168.194.200
AsyncOS 9.1.0 for Cisco IronPort C380 build 032
Welcome to the Cisco IronPort C380 Messaging Gateway(tm) Appliance

(Machine MYIRONPORT)> sshconfig


Choose the operation you want to perform:
- SSHD - Edit SSH server settings.
- USERKEY - Edit SSH User Key settings
[]> userkey

Currently installed keys for admin:

Choose the operation you want to perform:
- NEW - Add a new key.
- USER - Switch to a different user to edit.
[]> new

Please enter the public SSH key for authorization.
Press enter on a blank line to finish.
ssh-rsa AAAAB3NzaC1yc2EAAAABJQAAAIEAhLfUjKCnAPbYRg7XuVDwkqAML96jfxg9lVK7szZGY6TySTdX9xmbFFJIbfUAYvmytpE9HYtnt1EwEtUwOGTZOu8xmbS/PMwp/BnbrQUjJWTks8RtUPPuMXGHol3tzz20ZX3YrFy7otZGPsj3Ny44vHBqDBJBRUIWqqhUpFCBooc= IRONPORT-key

Currently installed keys for admin:
1. ssh-rsa AAAAB3NzaC1yc2EAA...hUpFCBooc= (IRONPORT-key)

Choose the operation you want to perform:
- NEW - Add a new key.
- DELETE - Remove a key.
- PRINT - Display a key.
- USER - Switch to a different user to edit.
[]>
(Don’t forget to commit the changes)
Connect using windows SSH client
Now we can use either plink or putty (download them here) to launch the remote SSH session or directly a command:
plink <HOSTNAME/IP> -i <PRIVATE KEY FILE>  -l <USER>
plink <HOSTNAME/IP> -i <PRIVATE KEY FILE>  -l <USER> command

putty <HOSTNAME/IP> -i <PRIVATE KEY FILE>  -l <USER>
putty <HOSTNAME/IP> -i <PRIVATE KEY FILE>  -l <USER> command
Note the “Authenticating with public key” line in this example:
D:\SCRIPTS\IRONPORT BACKUP> plink MYIRONPORT -i IRONPORT.ppk -l admin

Using username "admin".
Authenticating with public key "IRONPORT-key"
Last login: Fri Feb 26 10:47:49 2016 from 10.5.5.10
AsyncOS 9.1.0 for Cisco IronPort C380 build 032

Welcome to the Cisco IronPort C380 Messaging Gateway(tm) Appliance

(Machine MYIRONPORT)>

Schedule task
Finally, to automate the execution of Ironport CLI commands simply we could configure the task scheduler to execute a bat script, for example, to save a backup copy of the configuration like I explain in this post: Ironport – Schedule automation scripts on Windows
