The second of my post series to show the installation and setup of the Icinga monitoring tool. This one covers the installation of the Icinga 2 Web frontend.
Please, if havent done before, visit the first post Icinga – Installation / Setup on Debian Linux (1) which covers the installation of the Icinga core engine.
These are the steps i have followed (including the small problems i have found):
Install icinga web 2 packages
# apt-get install icingaweb2
This also installs dependencies like Apache2, PHP…
Icinga web 2 configuration wizard – Welcome (Token)
Access this url by changing to use your IP or hostname to access the configuration wizard:
http://<IP>/icingaweb2/setup or http://<hostname>/icingaweb2/setup
To start using the configuration wizard we have to enter a security we are supposed to have previously created…
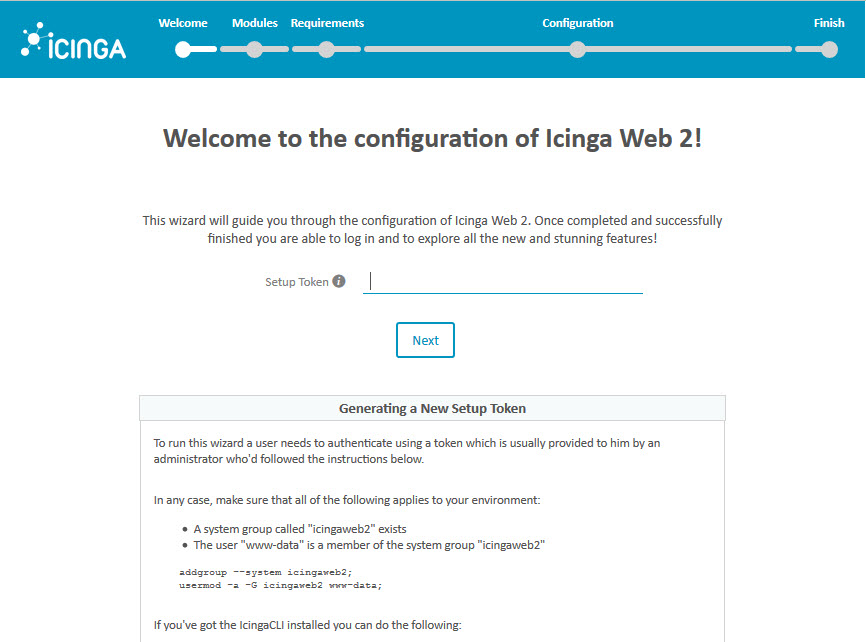
To create the token, just use this icingacli command:
# icingacli setup token create
The newly generated setup token is: 71e1fd13aa7d5f57
To show the value of the created token:
# icingacli setup token show
The current setup token is: 71e1fd13aa7d5f57
After entering the token, the following error was shown: Cannot validate token: /etc/icingaweb2/setup.token (FileObject::__contruct(/etc/icingaweb2/setup.token): failed to open stream: Permission denied)
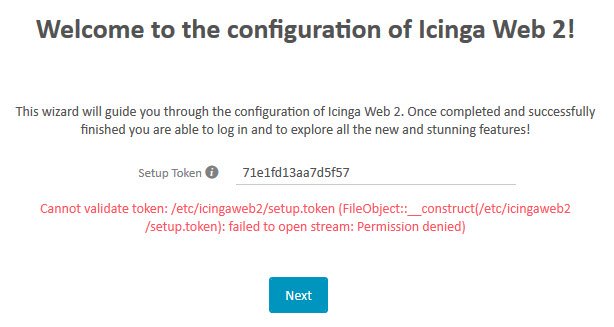
The www-data user must be included in the icingaweb2 group:
# usermod -a -G icingaweb2 www-data
# service apache2 restart
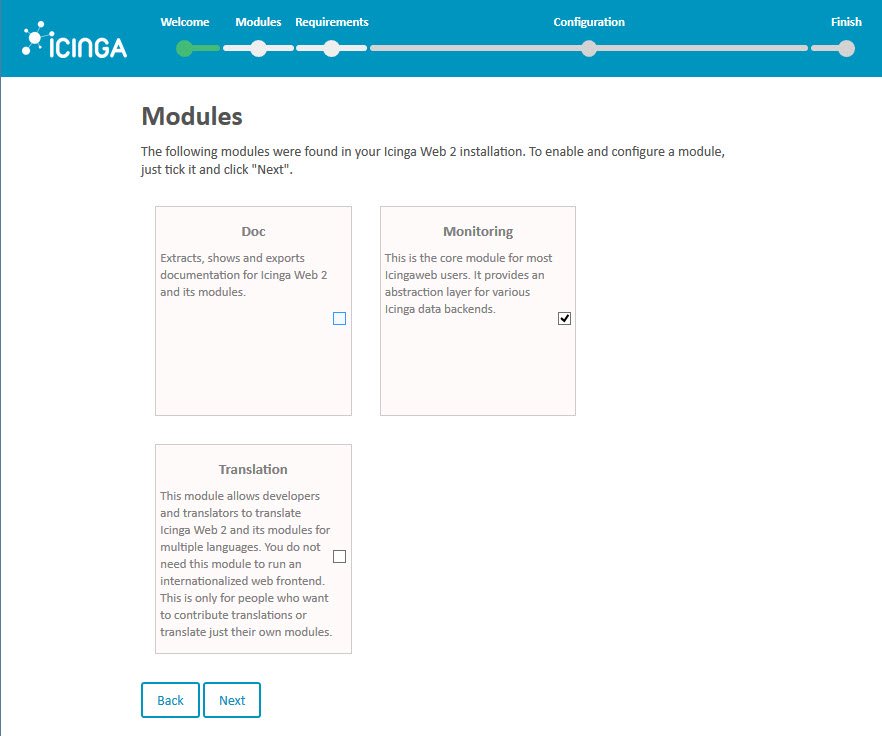
Icinga web 2 configuration wizard – Modules
If interested, Doc and Translation modules can be checked
Icinga web 2 configuration wizard – Requirements
This section shows the requirements needed and if they are correctly installed/configured or not…
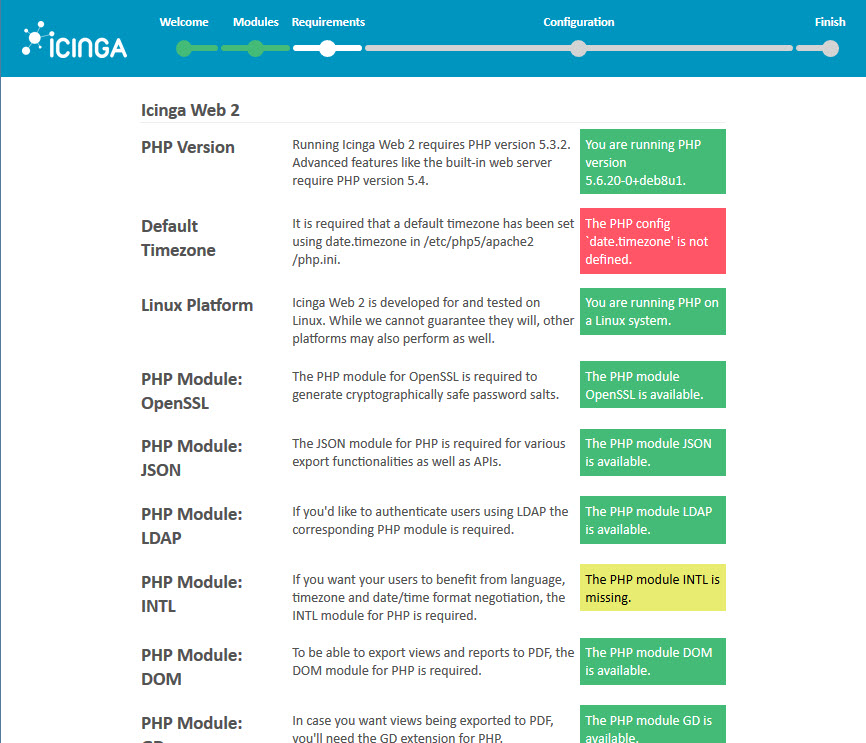
We should have found these requirements problems:


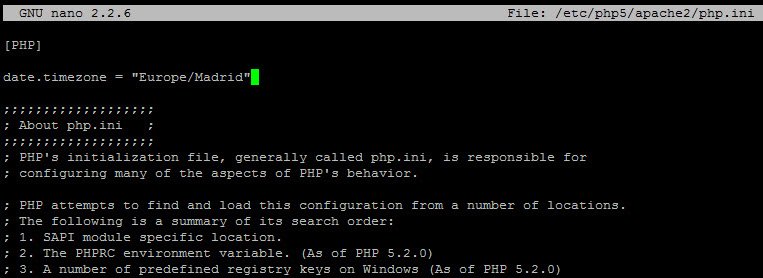
To solve the "Default Timezone", add the following line at the beginning of the /etc/php5/apache2/php.ini with the value of your time zone:
date.timezone = "Europe/Madrid"
And by installing the intl and imagick PHP modules, all the requirements are completed:
# apt-get install php5-intl php5-imagick
# service apache2 restart


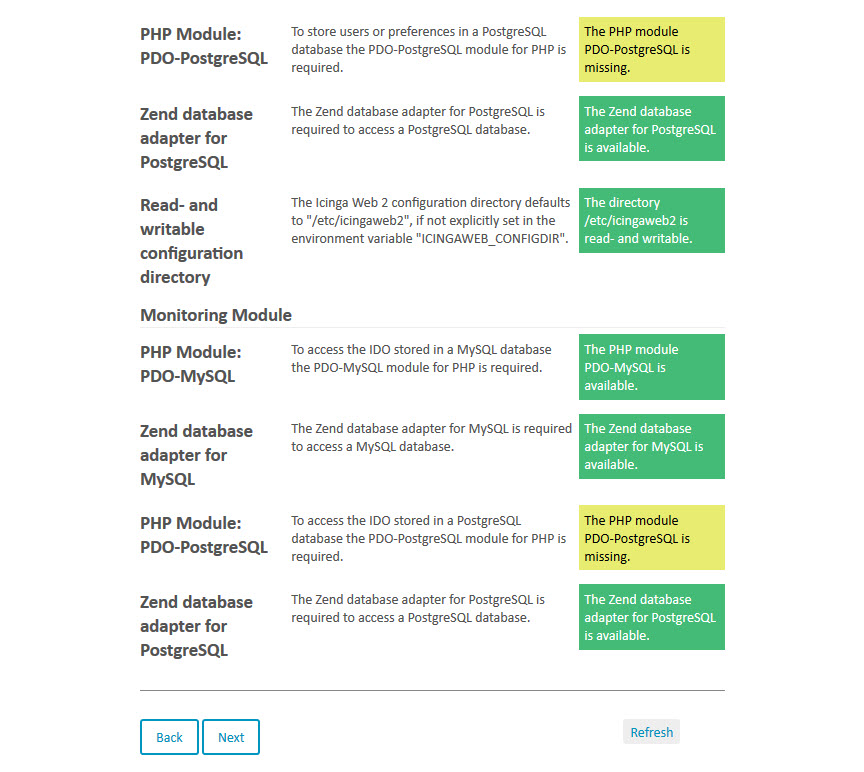
Given that we will use MySQL, you can ignore the PostgreSQL requirements…
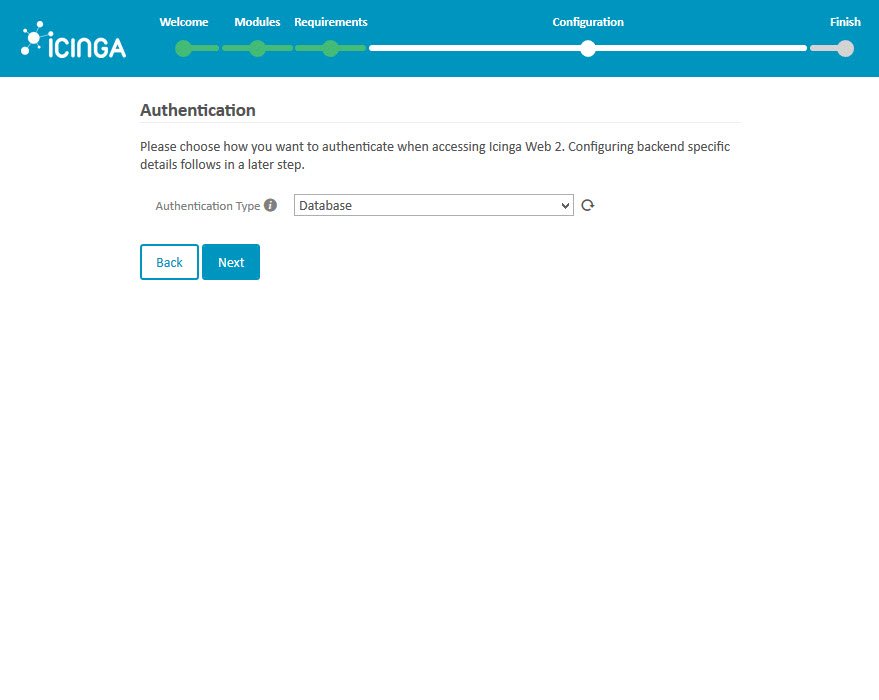
Icinga web 2 configuration wizard – Configuration
Now, we can follow with the configurations parameters (database, security, credentials…)
Authentication Type: Database
Fill the database data (name, user and password) to create it and push Validate Configuration button.
If correct validation, push Next
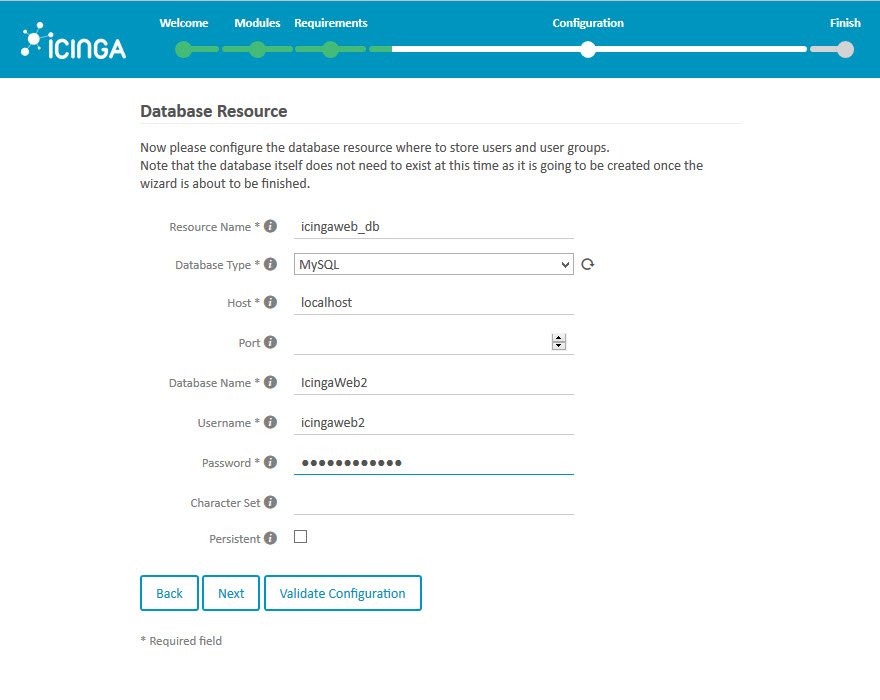
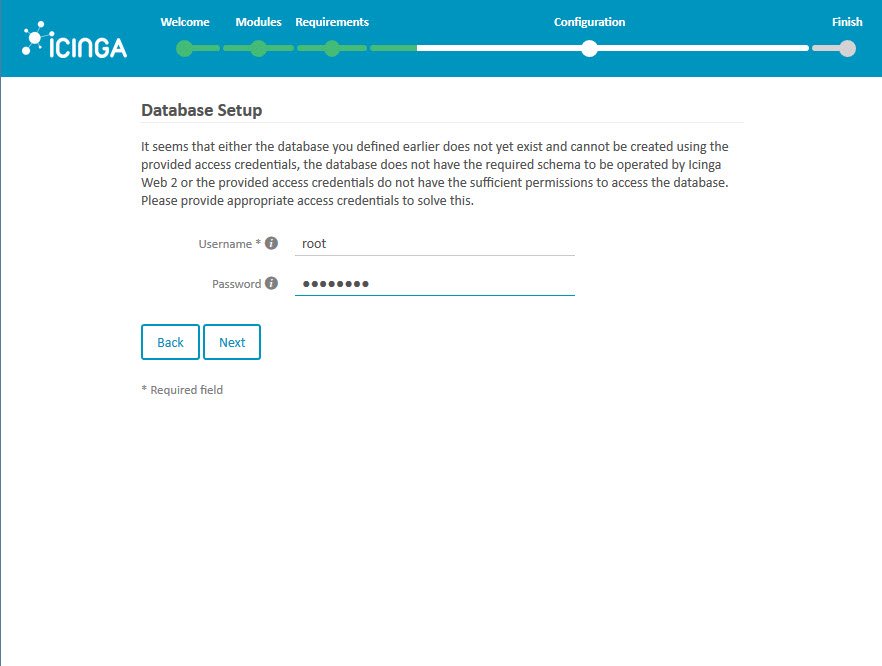
The icingaweb2 database must be also created, so it needs MySQL root credentials:
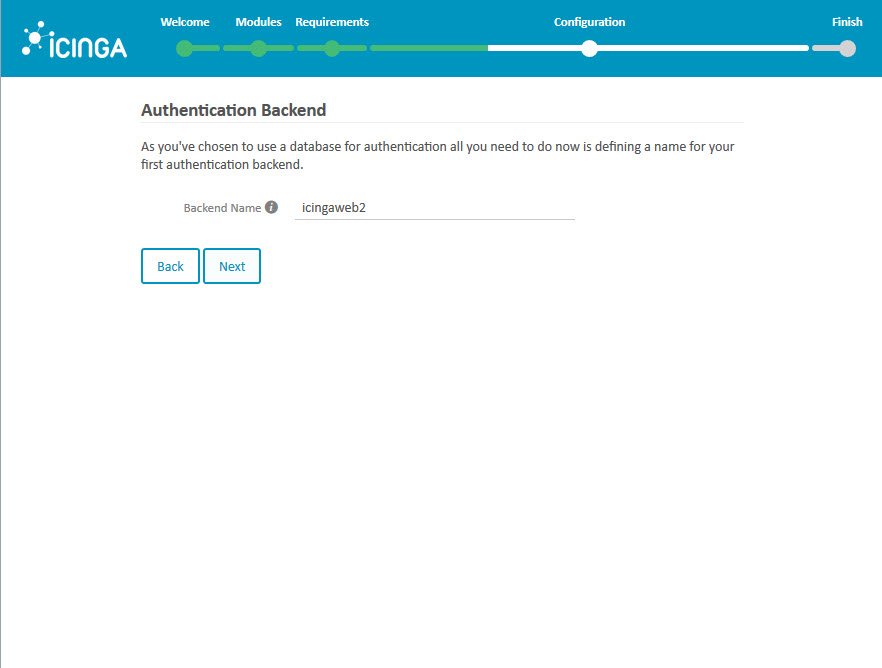
Choose the icingaweb2 as authentication backend
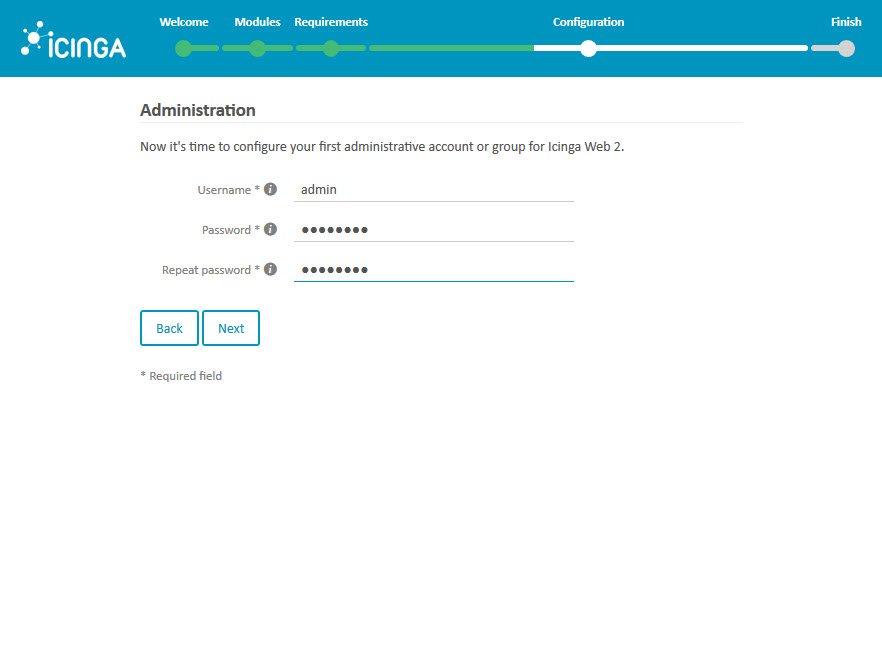
Set the accound data for Icinga web 2 administration (credentials that will be used to login as you will see at the end of the post):
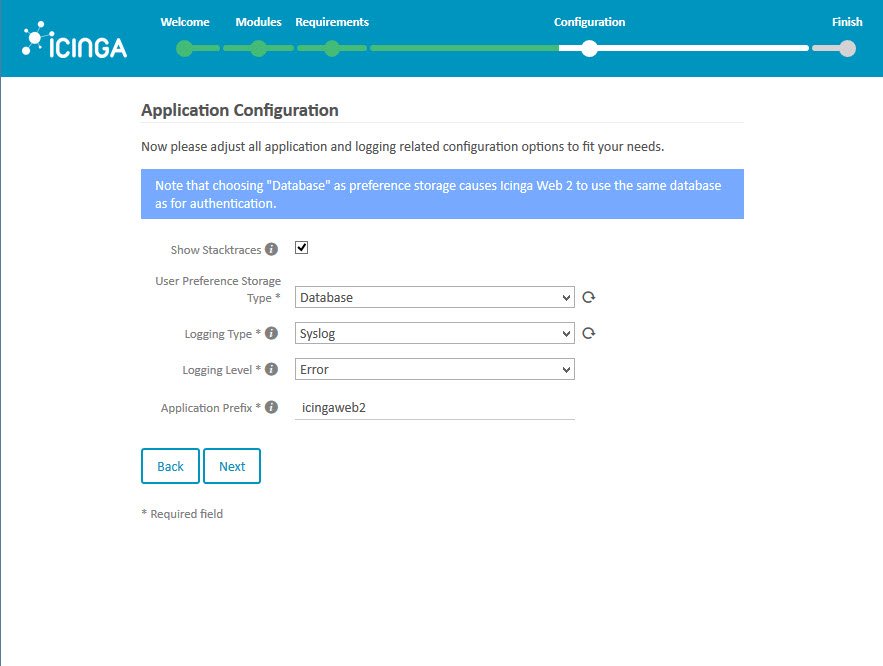
Adjust these settings for application and logging:
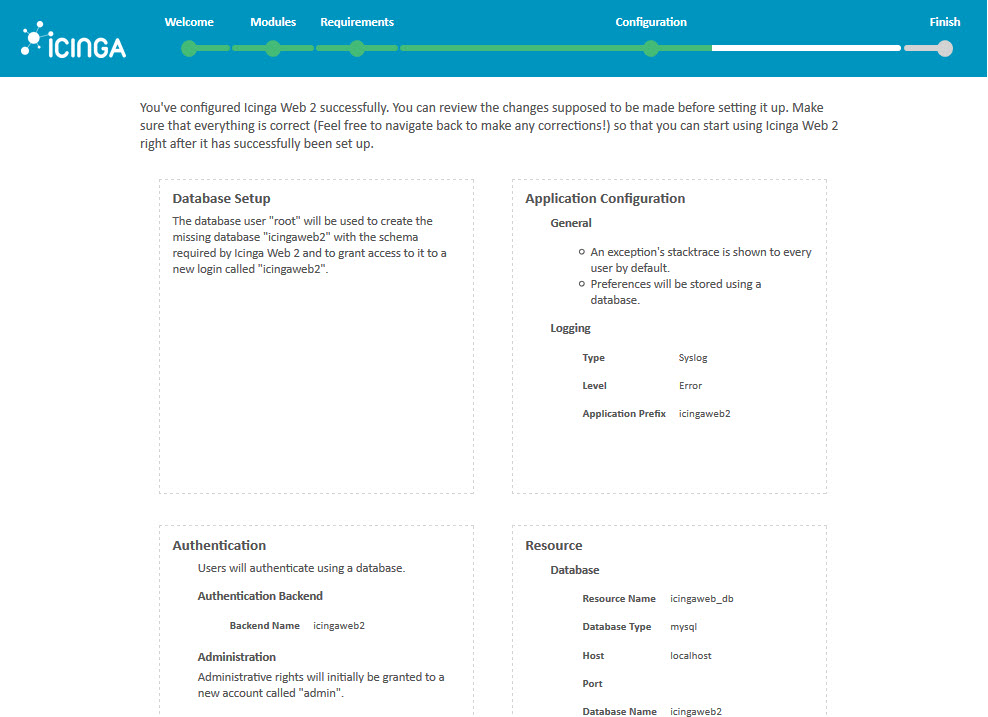
Icinga Web 2 succesfully configured. We can follow with the Next (push the button) screen
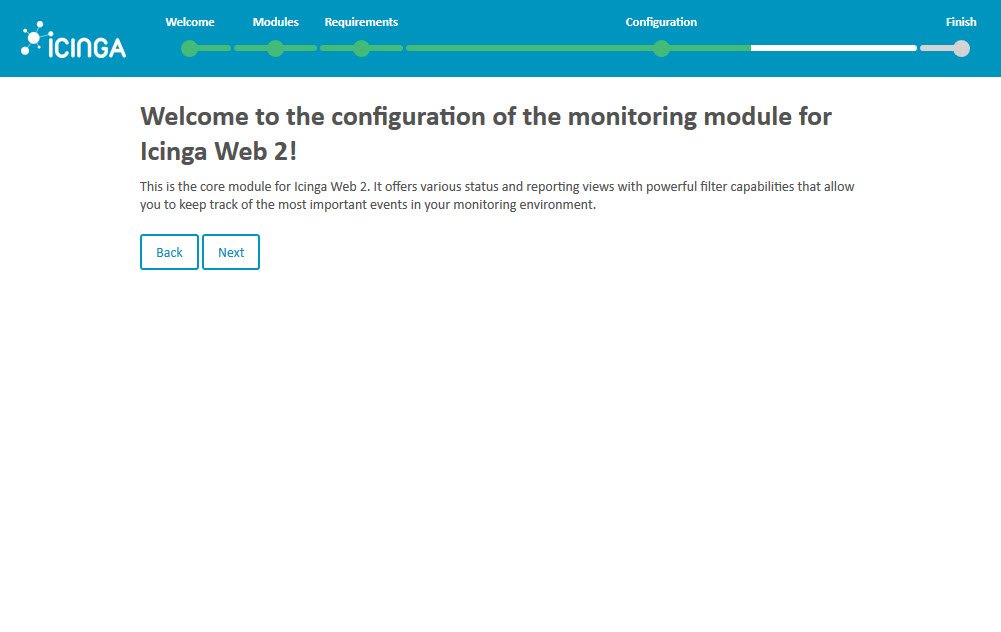
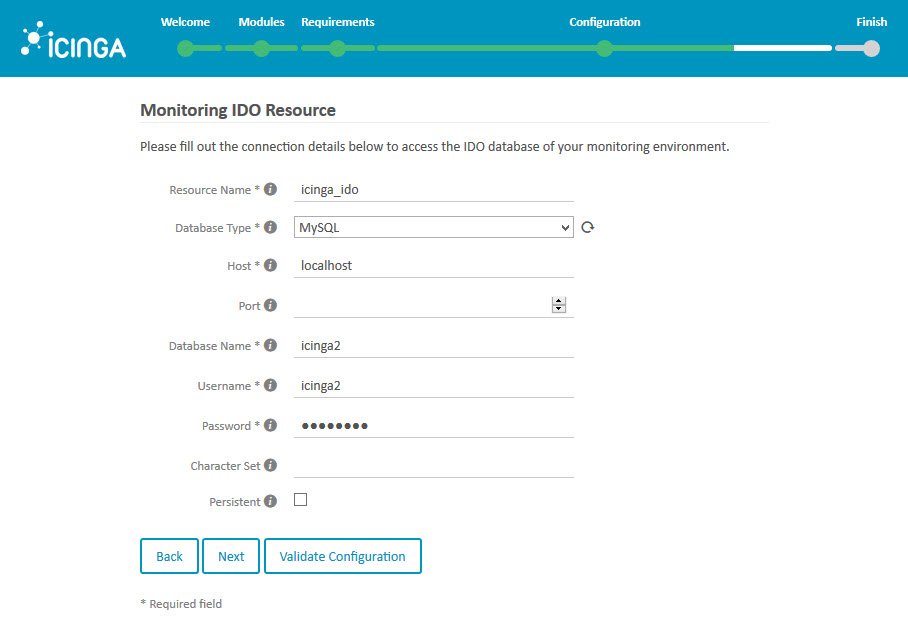
The monitoring module configuration starts here
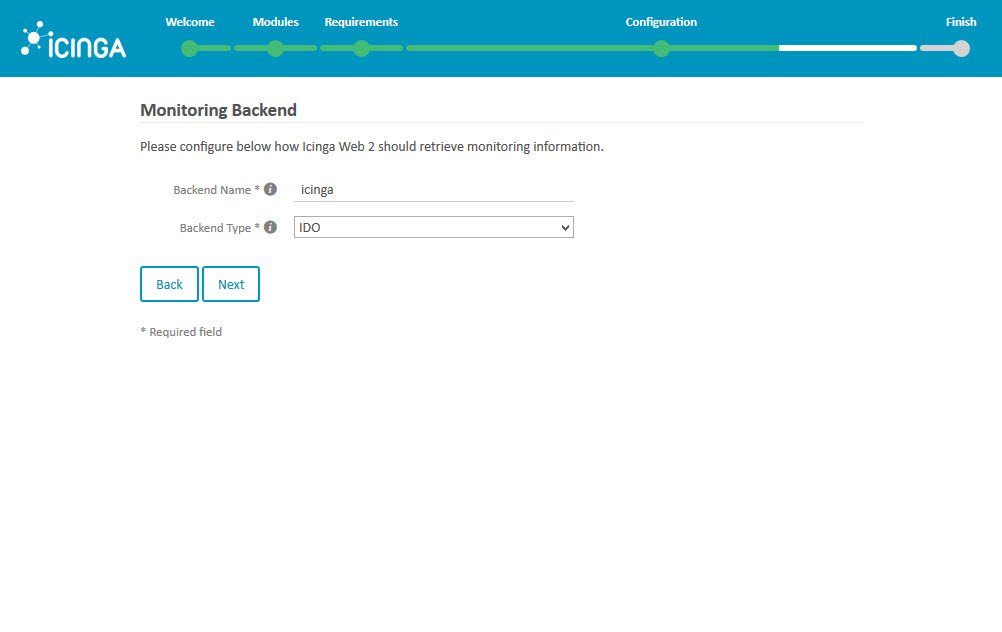
Choose backend type and name:
Fill with the appropiate credentials (created on the previous post) to log to the icinga2 database.
Push Validate Configuration and if everything ok, Next
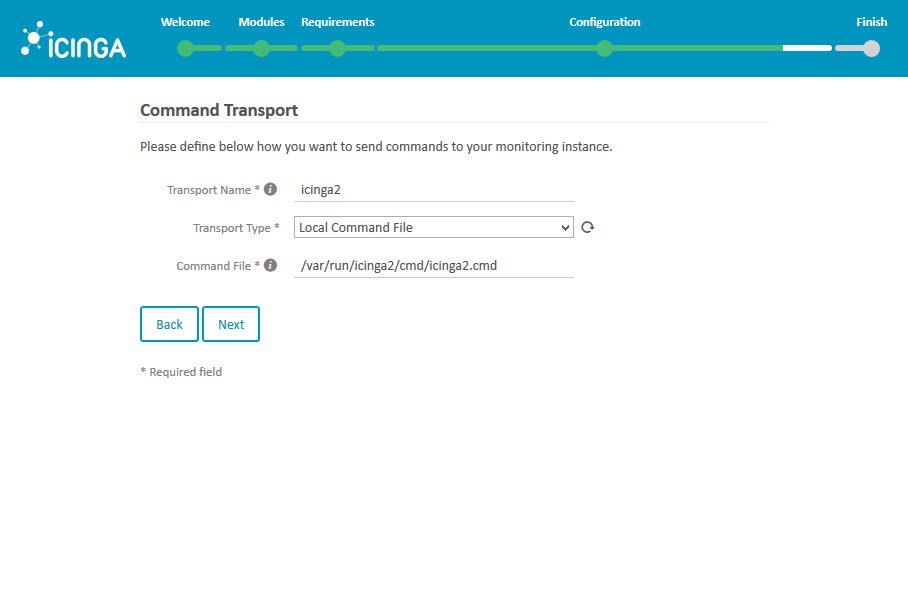
Set the way to send commands to the monitoring instance
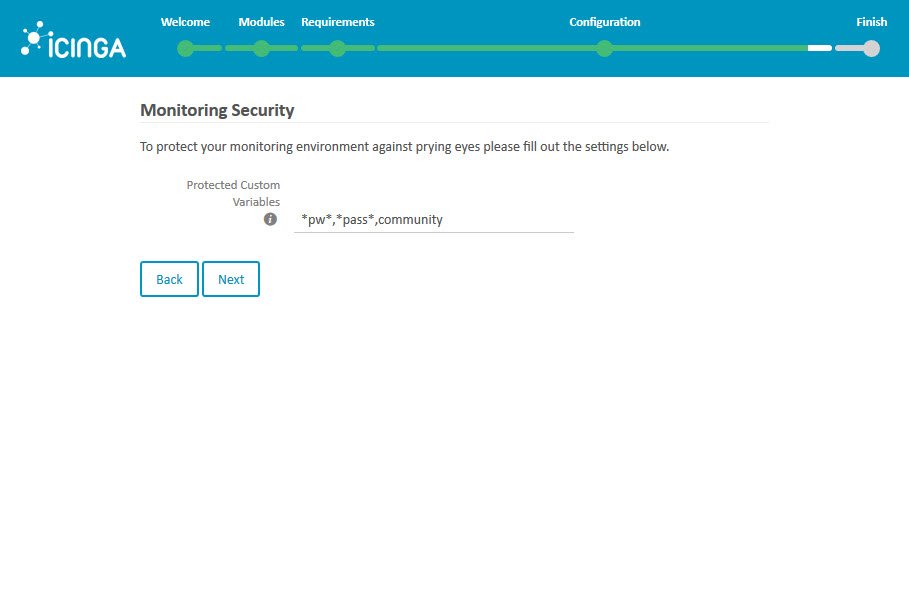
The protected custom variables to add some security
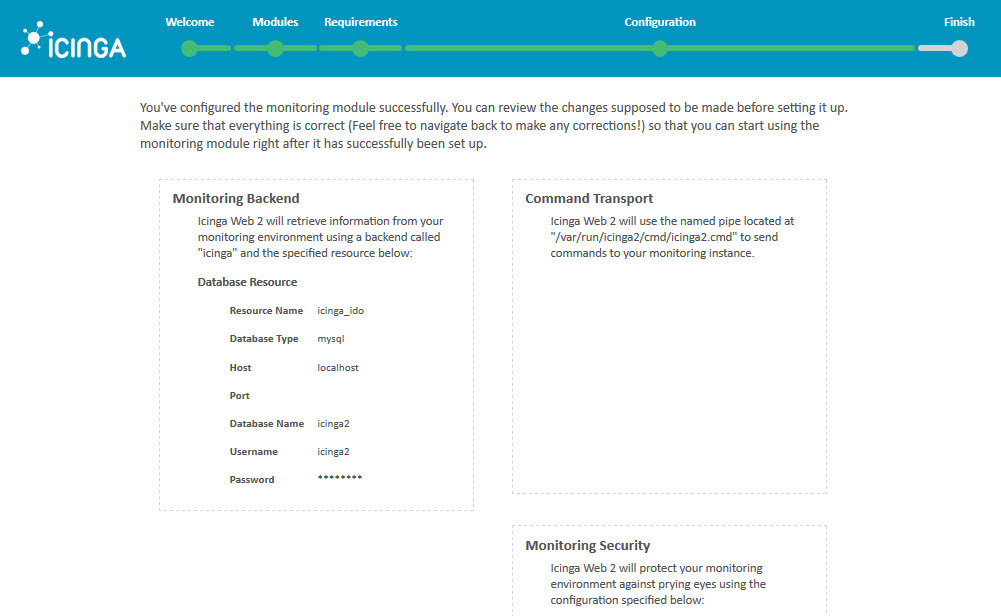
Finally configured the monitoring module!
Or maybe not!
Sorry! Failed to set up Icinga Web 2 successfully.

Creating new database "icingaweb2"...
Creating database schema...
Creating login "icingaweb2"...
...
...
Monitoring backend configuration could not be written to: /etc/icingaweb2/modules/monitoring/backends.ini. An error occured:
ERROR: RuntimeException in /usr/share/php/Icinga/Util/File.php:97 with message: Failed to create missing directory "/etc/icingaweb2/modules/monitoring/" (mkdir(): Permission denied)
Resource configuration has been successfully updated: /etc/icingaweb2/resources.ini
...
...
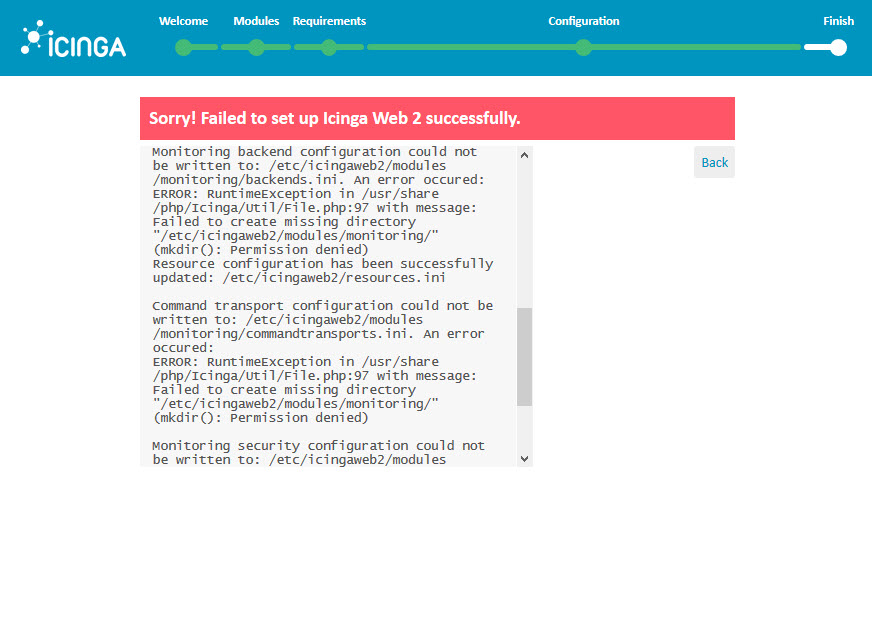
Seems it has no permissions to create a folder on /etc/icingaweb2 folder.
Lets check the permissions:
# ls -ltrh /etc/icingaweb2/
total 32K
drwxr-xr-x 3 root     root       4.0K Jun  6 11:54 modules
-rw-rw---- 1 root     icingaweb2   16 Jun  6 12:22 setup.token
drwxr-s--- 2 www-data icingaweb2 4.0K Jun  6 13:25 enabledModules
-rw-rw---- 1 www-data icingaweb2  156 Jun  6 13:27 config.ini
-rw-rw---- 1 www-data icingaweb2   54 Jun  6 13:27 authentication.ini
-rw-rw---- 1 www-data icingaweb2   77 Jun  6 13:27 roles.ini
-rw-rw---- 1 www-data icingaweb2   54 Jun  6 13:27 groups.ini
-rw-rw---- 1 www-data icingaweb2  327 Jun  6 13:27 resources.ini
Lets add some permissions to www-data user…
# chown -R www-data /etc/icingaweb2/

# ls -ltrh /etc/icingaweb2/
total 32K
drwxr-xr-x 3 www-data root       4.0K Jun  6 11:54 modules
-rw-rw---- 1 www-data icingaweb2   16 Jun  6 12:22 setup.token
drwxr-s--- 2 www-data icingaweb2 4.0K Jun  6 13:25 enabledModules
-rw-rw---- 1 www-data icingaweb2  156 Jun  6 13:27 config.ini
-rw-rw---- 1 www-data icingaweb2   54 Jun  6 13:27 authentication.ini
-rw-rw---- 1 www-data icingaweb2   77 Jun  6 13:27 roles.ini
-rw-rw---- 1 www-data icingaweb2   54 Jun  6 13:27 groups.ini
-rw-rw---- 1 www-data icingaweb2  327 Jun  6 13:27 resources.ini
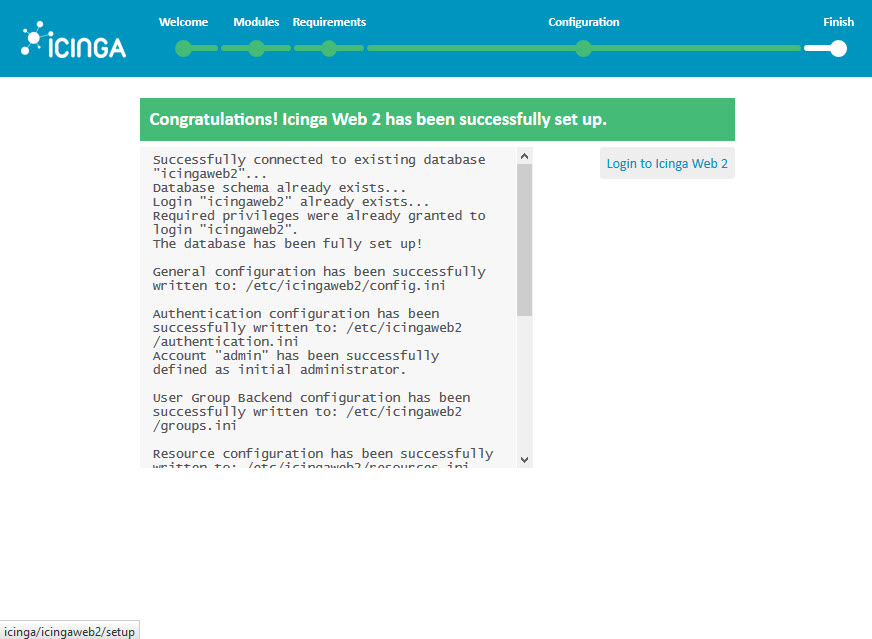
The problem seems solved! Now the Icinga 2 Web 2 is fully and succesfully configured!
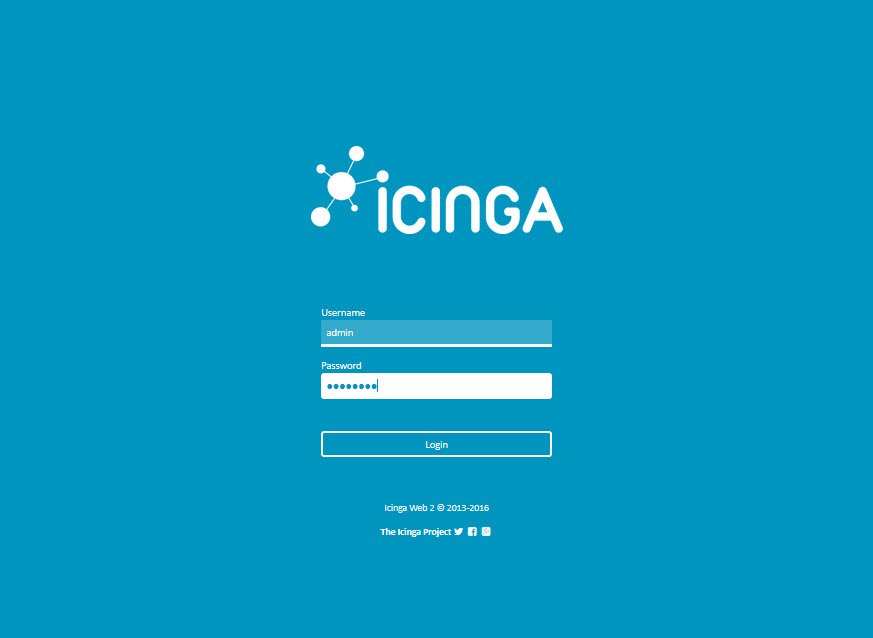
Time for the first login!
Finally, it's time for the first login in the Icinga 2 Web console!
Hope you dont have forgotten the credentials.
Change to use your IP or hostname to access the console:
http://<IP>/icingaweb2 or http://<hostname>/icingaweb2