Step by step procedure to upgrade an active/standby BIGIP cluster. In this example, I needed to upgrade from BIG IP v13.0.0.0 to v13.1.0.2
Download
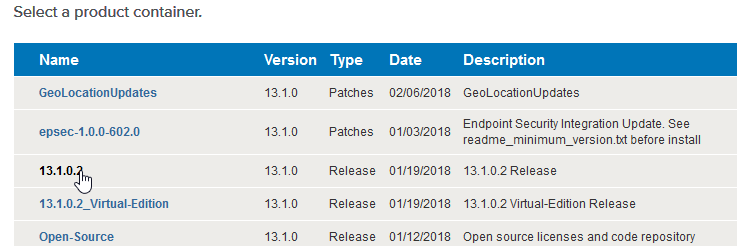
Login to https://downloads.f5.com/, search and download the ISO image of the version you want to upgrade to.
Export configuration
As a good sysadmin practice, it is better to export the configuration of both nodes before upgrading.
Using the web GUI (you can also use the tmsh command line) browse to System – Archives, and press the <Create> button.
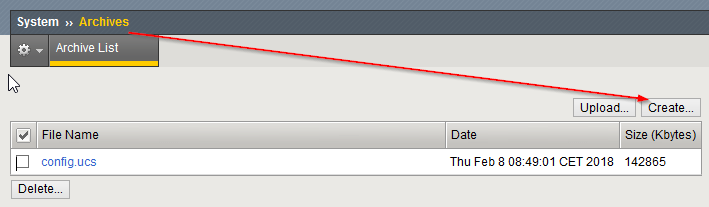
System –> Archives –> Create
After being created, download it to a local storage (your PC or laptop)
Reactivate license
A license reactivation may be neccesary on each node to avoid problems during the upgrade process (See https://support.f5.com/csp/article/K7727).
Determine the service check date by running this command:
# grep "Service check date" /config/bigip.license
Service check date :          20180208
If the service check date is earlier than the license check date (you can check it on the image in the download section), the license reactivation is needed by clicking the “Re-activate…” button under the License section:
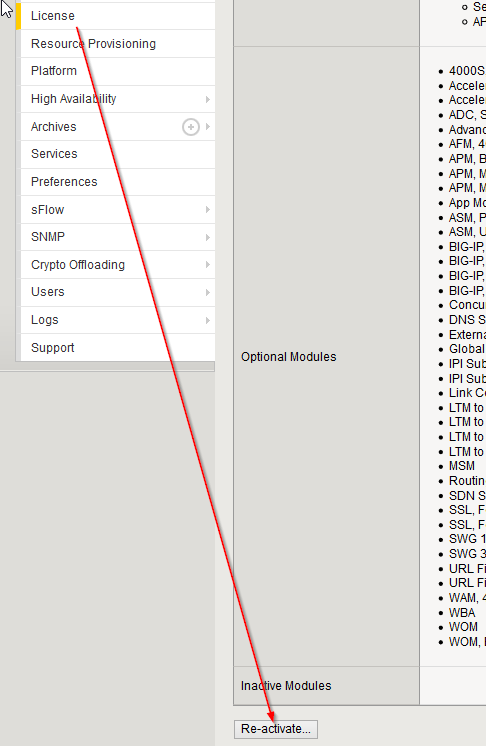
License –> Reactivate
Import
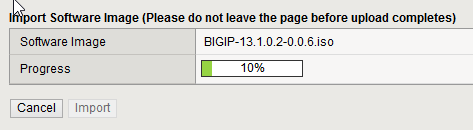
Import on both nodes the previously downloaded ISO image to make it available to the BIG IPs
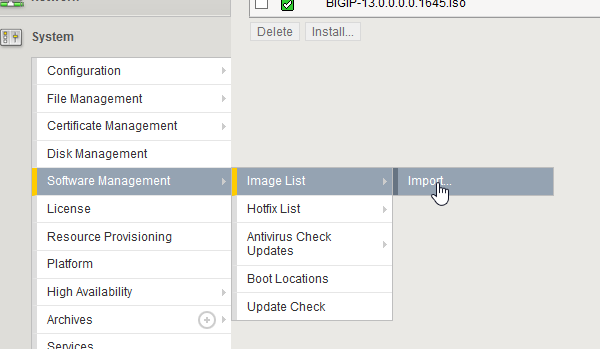
Software Management –> Image List –> Import
Install in a Boot Location
For both nodes, in the “Image List” section now the imported version is available in the “Available Images section”:
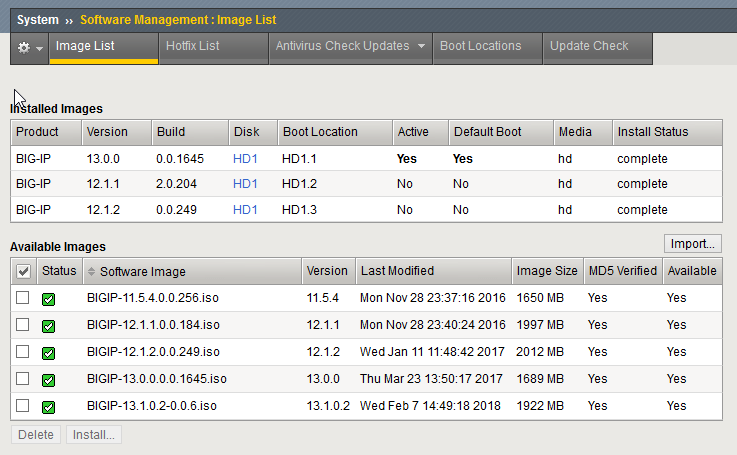
System –> Software Management –> Image List
Now it’s time to install it in a boot location.
In my scenario, the active version is 13.0.0 who is installed in volume 1 of disk 1.
The oldest installed version (12.1.1) is in volume 2 of disk 1, so this is a good target for the new version.
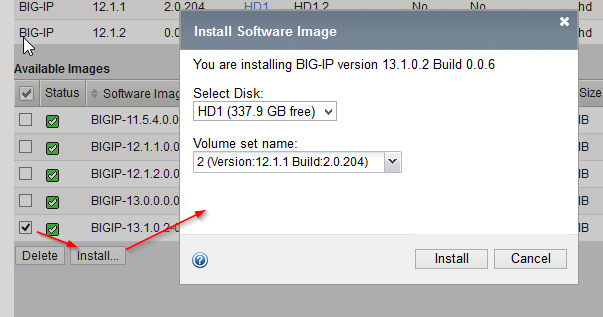
To do so, select the image and press “Install…” button. In the popup select the proper disk and volume and press “Install”:
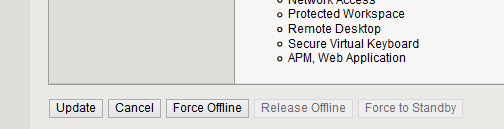
Force offline
This is not an essential step (given that we are always updating a standby node), but I prefer to set offline the node we are going to upgrade.
So, lets suppose node 2 is the standby one since the beginning. In node 2, press the (STANDBY)” link…

And then press the “Force offline” button to set the state to “FORCED OFFLINE”

Change active Boot Location
Now we are ready to boot this node with the newly installed version.
Browse to the “Boot Locations” tab and press the concrete boot location link you want to activate (HD1.2 in this example):
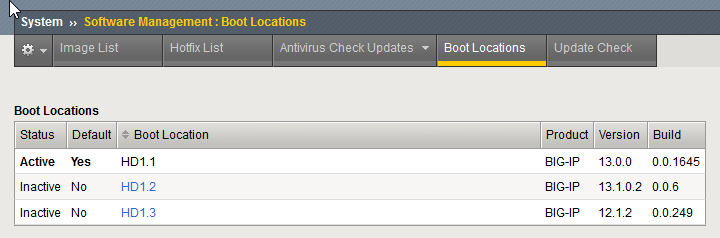
System –> Software Management –> Boot locations
Set the “Install Configuration” parameter to “Yes” (unless you want a clean configuration when booting the new version), select as source volume the last (and still current) active volume (in this example the 1st one containing version 13.0.0) and press “Activate”:
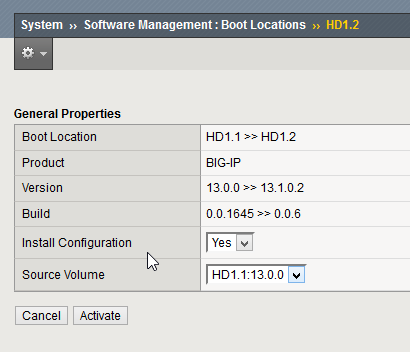
System –> Software Management –> Boot locations –> HD1.2
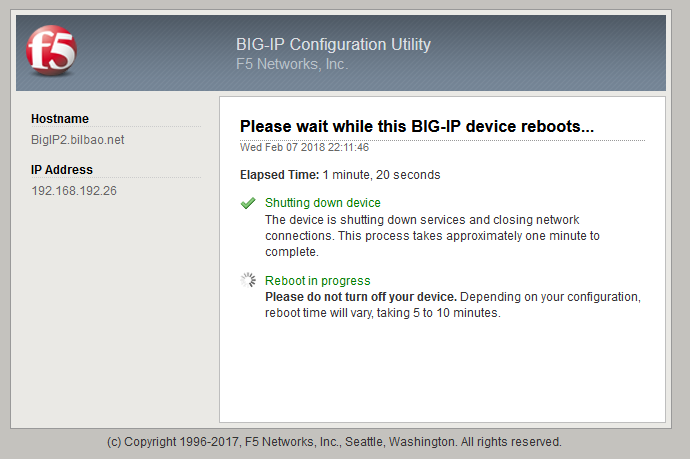
Wait some minutes until the device reboots and, afterwards, check it booted up correctly, the version number is the new expected one and that the configurtaion was succesfully loaded:
Release offline the upgraded node
After checking there seems not to be any problem, time to set this recently upgraded node as active. First of all, release the offline state:

Upgraded node – Release offline
Force to standby the non-upgraded node
Now, set the other node as the standby one so the upgraded one becomes the active

Non-Upgraded node – Force to standby
Test the new version
Now the new version is active, you can do more in depth tests. Ensure everything works correctly to proceed to upgrade the other node. Otherwise, aborting the upgrade would be neccesary if production is affected.
Upgrade the other node by repeating last steps
Repeat steps since “Force offline” to upgrade this node to finally finish the procedure with both nodes upgraded and as active/standby states